1. Quickstart
To use plantgl, you must launch ipython with the following option
terminal_linux:~$ ipython --gui=qt
Warning
If you do not use this option, you will certainly have problems if you want to display your results with the viewer.
To import all the modules from plantgl
from openalea.plantgl.all import *
1.1. Scene creation
The different primitives of PlantGL are assembled into a scene graph object. To create such object:
scene = Scene()
1.2. Create a shape
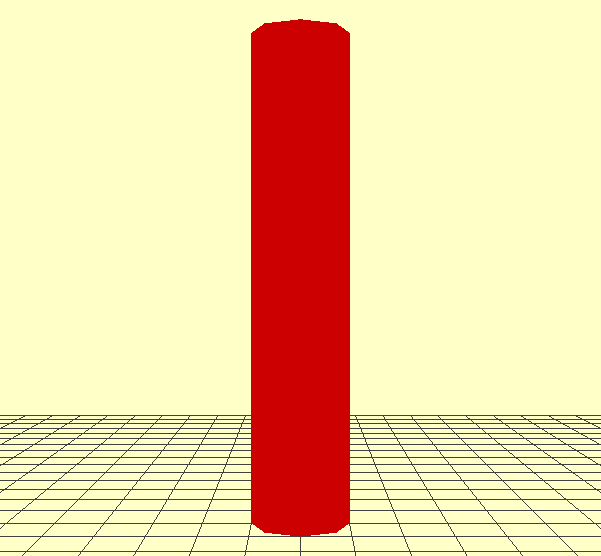
Some primitives can be instanciated with given material information. As an example , a red Cylinder can be created using the following code:
c = Cylinder(1, 10)
color = Material(Color3(255,0,0),0,Color3(0,0,0),Color3(0,0,0),1,0)
shape = Shape(c, color)
See also
tutorial.rst
1.3. Visualize the scene
The colored shape can be added to the scene and visualize via the Viewer:
scene.add(shape)
Viewer.display(scene)
1.4. Output
Finally, it is possible to save the current view in a PNG file. First, the background color and grids can be set using the following commands:
Viewer.frameGL.setBgColor(255,255,200)
Viewer.grids.setXYPlane(True)
Viewer.grids.setYZPlane(False)
Viewer.grids.setXZPlane(False)
Viewer.frameGL.saveImage("user/result.png")
1.5. Applying Algorithms
A number of algorithms are defined and can be applied to the geometric representation that have been created. For instance, to compute the boundingbox of the scene
bbc = BBoxComputer()
scene.apply(bbc)
boundingbox = bbc.result
Numerous algorithms have been implemented as Action that adapt to the specific structure of each scene graph.
1.6. Turtle Geometry
To assemble iterativelly and easily different shapes, the turtle geometry have been introduced in PlantGL. To use it, a turtle object has to be created that will register the different drawing actions to produce a final representation. For instance to produce a torus
turtle = PglTurtle()
for i in range(12):
     turtle.left(30).F(1)
scene = turtle.getScene()
Viewer.display(scene)